Halloween

2017_Halloween1

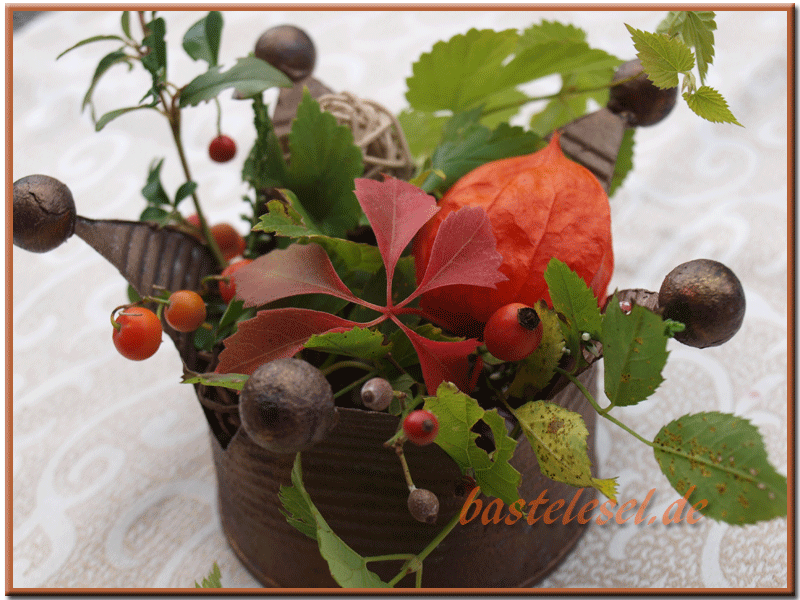
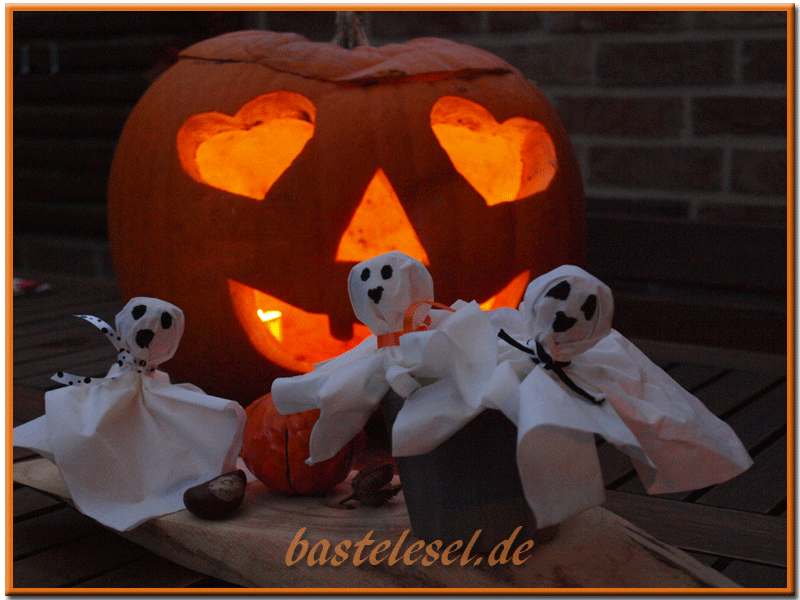
Pumpkin recipes and lots of halloween decoration stuff in crafting stores. Trick or treat is a question meanwhile asked in Germany too and specially this year with the 31st of October beeing a public holiday we will have halloween parties in many households. Searching the web I found a lovely idea for wrapping this year’s treats shown by familienkost.de. It’s worth buying lots of lollipops and a box of facial tissues. These will wrap the lollis as ghosts. Fix them with a black or orange curling ribbon round their stick. Draw eyes and mouth with a black felt pen. A flower pot filled with granulated decoration stones or sand will hold them upright. It’s not me who hollowed out the large companion watching his little friends’ danse. It’s a gift from a dear friend and with large tea lights inside he’s glowing for about 5-6 hours.

2017_Halloween2

In case you’re hosting a halloween party you may use the lollipop-ghosts for decorating the room or even the entire house. Simply put them in shot glasses, jem them between door and folding,  between books or behind a clock or picture hanging on the wall. For your party join them some plastic spiders, small decorative gourds and orange tea lights to create a real feeling of halloween.


Autumn crowns

2017_Krone9

For all those who love autumn colours I’ll show you some tin can crowns in a different colour version. After some experience with several crowns I now start priming all of them  with white colour first. When this coat has dried you may continue painting with mixed colours. For the ferreous look I poured black, copper and gold on a small plate to take up the colours with a sponge like I did for the other crowns. When dabbing the paint it’s spread irregularly and creates the ferreous look.

2017_Krone11

These little tea light holder crowns are twinkling in a lovely way due to the copper and gold painting. That shade fmatches very well with small flowers and twigs of bushes that are growing in your garden or can be found in your local forest. Add some hop and some physalis to give your crown a more autumnal look.

2017_Krone10You may as well decorate them without any fresh flowers. Just take some small rattan balls, join them with some felt roses and layer them in your crowns. Have look at last year’s post with the instruction for those roses. IF you’ve made large crowns the rattan balls and felt roses may be a bit bigger. Make a tandem arrangement of a crown decorated with flowers or other decorative parts and a tea light holder. Meanwhile I’ve even tried some Christmas decorations and will show them within the next days.


How to make a crown

2017_Krone5

If you have carefully cleaned your tin cans and taken off the paper labels you may start directly with their transformation into crowns. To divide the circumference equally for the crown’s tips you may work two different methods. In both cases you will need a stripe of paper as high as the can and covering its circumference. For eight tips you then need to fold the stripe in half twice. Re-open it and fold the four segments in halves again to get eight segments in total. Draw a line for the tips’ height and draw triangles from each segment’s centerpoint to the auxiliary line. For an odd number of tips you need to divide the paper stripe’s length with the number of tips and draw them with a ruler to be able to draw and cut the triangles.

2017_Krone7For small cans I prefer eight tips but for the largest cans, found in a staff canteen, I’d take only six points because together with the large cotton wool or wooden balls this makes a more harmonious look. (The foto shows a pattern with 6 points on one and 7 points on the opposite side. Regarding the desired number of tips you just need to place this side at the top of your can.) Now just cover the can with your pattern and draw the tips’ lines with a permanent marker.

2017_Krone8

Cut them out with your tin snips. Be careful when cutting because there may be small edges which are rather sharp. If you want to use your crowns for a longer period then you should chamfer the tips’ sides with a file or a grindstone. Afterwards you may glue the cotton-wool or woodn balls with some hot glue.

2017_Krone6To get the vintage look you need to paint the cans. Give black, white and silver grey acrylic colour on a plate and take them up with a piece of sponge without mixing the colours. Dab the colors on your can and when still a bit moist just dust with some baby powder. Get rid of excessive powder by tapping the can’s bottom.
After the color dried you may plant some flowers inside or just decorate it with cut flowers and leaves. Ribbons and small pendants will make a lovely center piece or room decoration. You may as well put a tea light holder inside.


I

Royal table

2017_Krone1

For my today’s post I have to go into greater detail. My husband’s Schuetzen-formation called William Tell Formation is having a shooting competition (using a wooden bird) every year. The winning contestant will be their “King of Formation” and his wife as his queen has to organize a women’s breakfast during Schuetzenfest /marksmen’s festival. For this occasion I was looking lots of blogs and galleries to find some ideas with crowns. I found some lovely proposals and soon I saw me using tin cans for flowers and candles.

2017_Krone2

Therefore I needed to collect different cans. It’s not that easy for summer time because most of the fruit and vegetables are offered fresh from the fields. Enforcedly I had a lot of cheese cakes and curd cheese desserts with mandarin organges. Their cans are perfect for flowers and the smaller ones, usually containing grains of maize, were used as tea light holders. I decorated the cans with some paper cut apples (in dependence on the legend of Tell’s apple shot) and the vintage look just goes very well with them. Ribbons in black, white and red completed the flower and candle cans.

2017_Krone3Using the same colours I took some simple red paper napkins. These are held by grey felt crowns cut out of tradional crafting felt. Two holes in the center give passage to the 30cm long ribbon  that’s wrapping the folded napkin. Find a crown pattern in this post here. A detailed instruction for different can crowns and their various decorations will follow within the next days. So, just start to collect cans, clean them and peel off the labels. In addition you will need tin snips, acrylic paint in black, silver grey and white and cotton wool or wooden balls matching with your can’s size.


Back to school

2017_Stifte1

Soon we’ll have to got back to school and for some of us it’s just the very first day of school that should be enlightened a little bit. With the help of brother or sister, grandparents and maybe godparents you could celebrate this day. Oversize card stock pencils (seen at wunderweib.de and adapted) will be a lovely centerpiece.

2017_Stifte2

For each pencil you’ll need a card stock piece of 16,5 x 17cm. Fold it at 3,6,9,12 and 15cm on the short side so that you will have a 1,5cm flap to close the pencil lateron. Fold a line at 5cm on the long side of your card stock. This serves to adjust the crepe masking tape. Then draw all necessary lines for pencil’s tips; adding a flap on one side of each tip – see template for download. Cut off the parts between the tips and fold the small flaps. Put some double sided adhesive tape on the 1,5cm flap and join the sides of your pencil. Then put some liquid glue on all five small flaps at the top and put the tips together.

2017_Stifte3Prepare several pencils and use them as a center piece or just decorate every guest’s place with it. Just print some name tags and glue them to lone side of the pencil. For pencils decorating your table center just print tags with the cardstock colors used and glue them on the corresponding pencils. I made my pencils without a bottom because I don’t need it for the center piece parts and I like it if the give away wrapping is to be seen. If you prefer making a bottom then just extend the long side of your card stock (see template), cut in the 2cm parts and glue them one on top of the other after having closed the pencil on its side. Take little rubber gums, small pencils, felt pens or some sweets to fill in the large card stock pencils. I collected time table printouts that are displayed at no charge in our local stores and used them as placemats. Some cake with lots of sprinkles and everyone will be happy for this first day of school.