Lavender wand

Lavender1

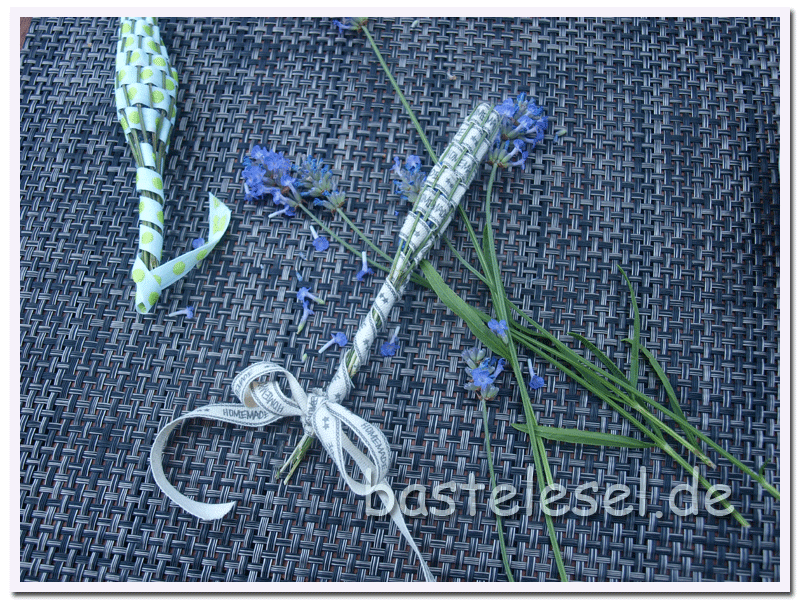
Summertime, vacation – who won’t think of sun, beach and waves. But of course we’re thinking of those large purple lavender fields reaching the horizon in Tuscany and Provence. Even in Germany you’ll find lavender in nearly every garden or on numerous balconies. If you’re really fond of it you’ll always try to conserve their lovely odor for the rest of the year. On etsy.com I found some nice lavender wands which I tried immediately. It really wors and it’ll take you just half an hour to make one yourself. Cut 11-15 lavender flowers with a stipe length of 15-20cm. Wrap your lavender weaving the ribbon below and over your stipes. I’ll link here to etsy.com because all pictures will show exactly all steps necessary.

Lavender2

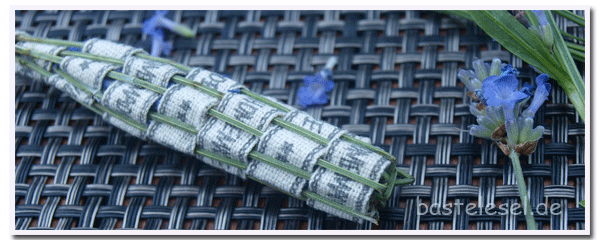
For your ribbon choose one that matches with the recipient’s favourite colors, with the other decoration or simply with lavender stipes’ green. I always add a loop to the wand’s end allowing to hang it up on a clothes hanger.
Give it into a small cellophane bag and you’ll have a wonderful little gift for summer time.


Barbecue

Barbecue1

Initial part of my last week-end barbecue table decoration were these little wooden flowers glued on cloth pins. An off-white table cloth formed the neutral layer for dark brown paper napkins and felt coasters.
A glass candle holder filled with small pebble stones gave us a restrained light after sunset. From my garden I took some flowers looking brown just before their buds are turning into a dark purple. The paper napkins are folded as a cutlery pouch and decorated with the mentioned wooden flowers. Barbecue2I just changed the last part of the youtube folding instruction by stopping to fold down the last upper layer about 1/2 inch before the lower tip. Color turned up to the table thanks to my guests and their wonderful salads and other barbecue condiments. (Forgot to take fotos because we had so much fun) This table looks very nice too with other plain-colored accessories highlighting thus the ragtag of summer food.

Mini shortbread cups

Flowercup5

My last discovery for desserts – small cups of shortbread filled with various sorts of cream. Based on a traditional shortbread recipe you simply have to roll out the pastry at 2-3mm and cut cookies. Your cups will look very nice with a flower shaped cookie cutter but cercles and squares will work too.

Flowercup1a

Place the cookies on top of your mini cupcake mold and lightly press them inwards with your forefinger. Then bake them for 10-12 minutes at 180°C.

Flowercup2a

Leave them in your mold for some minutes to cool down, then turn it upside down and your cups will fall out easily.
You can fill them with a mixture of curd cheese and crème fraîche refined with some whipped cream. For my first attempt I added some strawberry puree to the cream.

Flowercup3

They’re quite delicious too with a mixture of lemon cream and some yoghurt. Decorate them according to the cream filling with fresh fruit, sugar sprinkles or rasped chocolate.

Flowercup4

These little shortbread cups are perfectly made for large buffets because they are easily prepared in advance and stored in the freezer. Stockpiled you can put a lot of them in a standard tupperware container, defrost them when you need it and fill them as you like.

If you don’t have a shortbread recipe available, take this one for about 40-48 cups depending on the thickness of your unrolled pastry:

250g wheat flour, 2 tsp. of baking powder, 100g caster sugar, 1 bag of vanilla sugar, 1 egg size M, 125g butter
Mix flour with baking powder and add other ingredients. Work carefully with the hooks of your hand mixer until getting a soft pastry. Wrap in a plastic film and keep in the fridge for half an hour. Unroll on a lighly floured surface and continue as described at the top.

Paper vase

 Papiervase1

Inspired by folded muffin wraps I made these little green vases for my strawberry table decoration. The advance of these vases is that you can produce them at any time in any color you need.
According to the flower and the size of the water container you’ll need origami papers mesuring between 10 or 15cm.
First determine the center point by folding each paper diagonally twice. Don’t fold the whole line but just press down the center and open the folds again. Then place your paper on the bottom of a reversed water glass.

Papiervase2aPapiervase3

Fix the center with the forefinger of one hand and make a fold in the middle of one straight side with the other hand in clockwise direction. Repeat with other three sides of your paper. The corners are coming up when finished. Now enclose the glass bottom with both hands, press and streak downwards.

Papiervase4Papiervase5

The paper will assume the shape of your glass and only has to be lifted and turned.

Papiervase6Papiervase7

Choose a small shot glass or a tealight holder as a water container. I had some left over plastic shot glasses fitting perfectly into my paper vases.

Papiervase8

Take some nice flowers and place them in your vase. For larger flowers (see foto on top) I recommend to fold the tips of you vase outward because otherwise your vase won’t be seen.


Strawberry center piece

Erdbeerdeko1

Strictly in file gerbera and fabric strawberries are arranged in the center of my table. Match them with a red or green and white checkered table cloth or put them directly on a rustic wooden table.
 The following picture shows some ladybeetle paper napkins on a white plate. The bigger plate on the left repeats the strawberry theme and is to be used for pastries or other snacks.
Erdbeerdeko2

If you like it fold the paper napkins as a heart or as a cutlery pouch and place a single fresh strawberry beside it.