Natural hand scrub

Peeling4

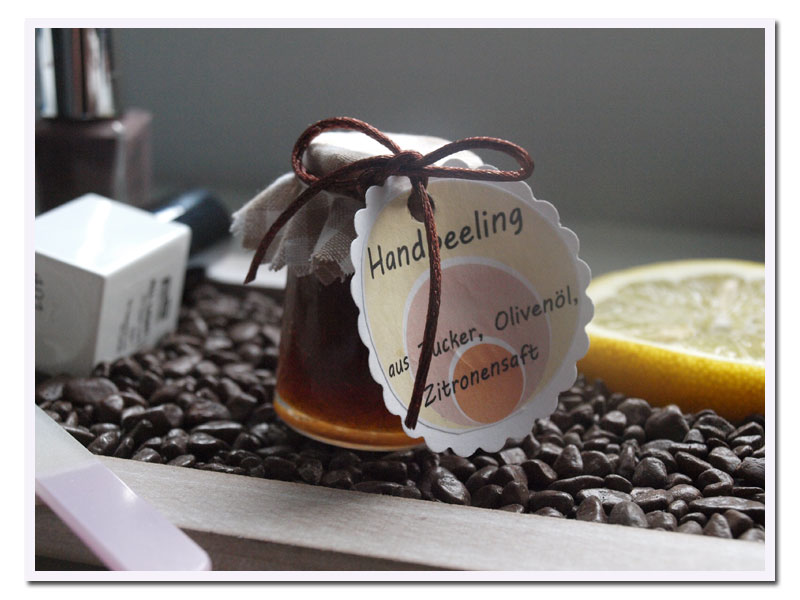
Spring’s coming with longer days and more sunshine. That means you can leave at home your gloves. Cold winter air and lack of sunlight makes your hands suffer. The skin dries out and becomes harsh very often. A homemade skin scrub (recipe found on stephanie lynn’s blog – www.bystephanielynn.com) may help your hands. The ingredients are to be found in most households and if not they’re available at the grocery’s. It’s best to prepare only a small quantity because we of course don’t use preserving agents. The quantity of ingredients is just enough for two small 20ml/0.7fl.oz jars. Usually I’m taking one for myself and the others as a gift. Attach a lovely tag and offer it in a cellophane gift wrap. Be sure that every friend will be delighted when receiving this little gift.

Peeling1Ingredients:
50g/1.8oz brown sugar,
appr. 25ml/0.8fl.oz olive oil,
1 tbsp lemon juice

Mix the ingredients. According to consistence of sugar take a bit more or less oil.

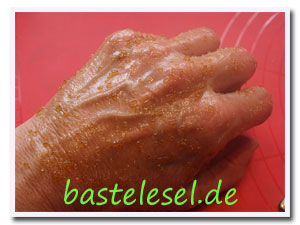
With a small spoon take a walnut size quantity of the srub and take it in your hand. Spread it evenly on both hand backs and your palms and leave it for a few minutes. Then rinse with lukewarm water and continue your manicure like usually.

Peeling2

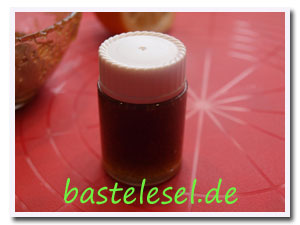
Just fill the remaining scrub in a small jar and keep it in a dark cool place – the fridge is ok. If you keep it there you should take it out a while before using it because if not it’ll be too firm.

Peeling3

If you don’t like the odor of olive oil you may take any other cooking oil as well. I prefer my beloved walnut oil. My skin’s of the same value as my stomach.


Organizing

Hangers1

Fasting period that’s not only abandonment of food but also a period of thinking about daily routine or bad habits. For me it’s every year again my closet full of clothes. I really do want to reduce my number of shirts, pants and so on but again and again it’s quite difficult to decide whether I want to give away things or not. Now I found a nice proposal somewhere in the web which I’m going to try right now. Just place all hangers (really all of them) in your closet with the hooks’ nose showing to you.  After you’ve been wearing one of your garments hang them back into the closet the other way round i.e. hook’s nose showing to the back. About half a year later you’ll see which garments you didn’t wear at all because their hangers will still show their nose to you. If you don’t feel capable to throw them away just wait another six month and if they’re still hanging the wrong way you won’t have any reason any more to keep them. Just give them to a thrift shop where they’ll surely find new consumers.


Royal gift box

Crown1a

Whatever it will be filled with – this lovely crown purse will make every girl’s heart beat faster. The sides are embellished with parts of doily border and little stars are glittering on its tops. The name tag is fixed with a satin ribbon and clearly shows whom it belongs to. It’s crossed to form a loop and glued between two punched card stock circles. A template for the purse for download here. The center strip is folded at 2 4/5″ and 8″ and then glued to bottom and sides of both crowns. To complete the purse you need a strip of 8 x 2/5″ that makes the handle and is glued to the crowns’ inside. A papcer circle of the points size will cover it. Further embellishments are possible and it’s up to you how and where you’ll place them.

Crown2aCrown3a

Light Snack

Cheesesnack4

If you belong to those who thought that without cake and other pastries kitchen life would be boring your definitely were wrong. My well-loved cookie cutters were allowed to show what they’re good for with harder food. With their help I wanted to shape some appetizers with cheese, cucumber and bell pepper. So the vegetables were washed and cut into adequate slices. The cheese was cut into 1/5″ slices too und served as a stand for cucumber and bell pepper hearts and triangles. Just add some small tomatoes and pretzels and serve all on a nice plate. You’ll have a nice snack making you completely forget about chocolate, wine gum or jelly beans.

Cheesesnack3


Wooden panel

Woodpanel1

Here we are with the first non-recipe post! Walking through our forest I couldn’t resist collecting bark pieces lying around. At home they only had to be cleaned and ranged for drying. To fasten a test tube I drilled two  1/5″ holes. This is quite easy with a hand brace because some parts of the bark are quite fragile. At the bottom of the test tube I glued a small piece of driftwood (you can buy driftwood at florists or crafting shops) to the bark. That looks nice and prevents the tube from sliding down. Take the test tube aside and spread some clear varnish on both sides of the bark; quite easy if you choose a spray can. After the varnish has dried lead a 10″ hemp ribbon through the first holes from the back of your bark to the front. Turn it round the test tube and return to the back through the second hole. Make a strong knot on the backside to fix the test tube and a second knot to get a hanger loop. Fix both knots with some glue.
Give a single flower and maybe some ivy or any other tendril into the tube and you’ll have a real eye-catcher in your home wherever it’s hanging.

Woodpanel2