Christmas table II

Weihnachtstisch6

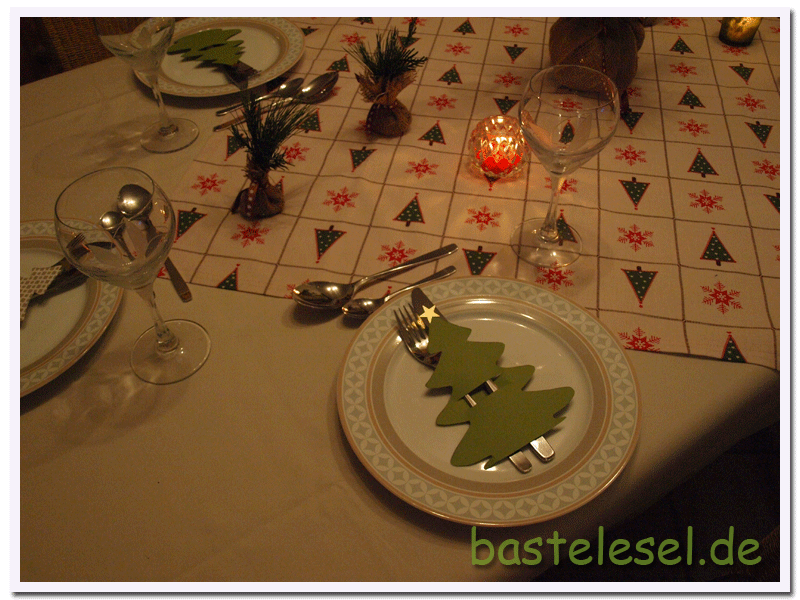
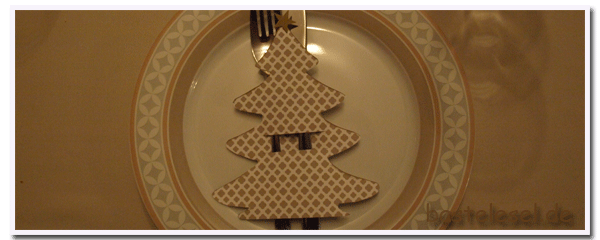
A table setting for all those who don’t have enough time to prepare but still wish to have a festive decoration. The center napkin provides the theme – Christmas trees. Elegant paper trees in matching colours serve as cutlery holders. Ferrero offers a free template for these lovely trees. Click Schablone.

Weihnachtstisch7

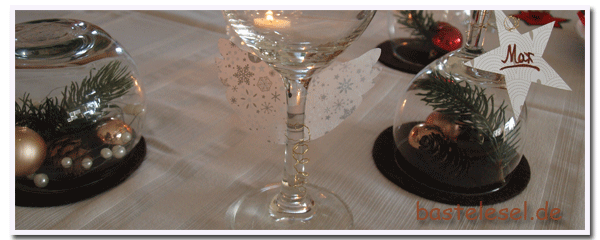
A cream colored Amaryllis accompanied by some pine twigs makes the center pieces.Weihnachtstisch9 
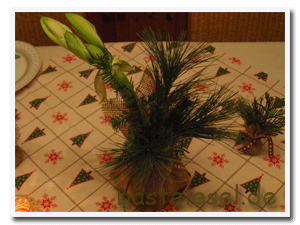
It’s standing in a globe vase wrapped in a piece of burlap so that it fits with the other little trees on table. Place the vase in the center of a burlap square cut according the size of your vase,  join the ends above the vase’s edge and then fix them with a Christmas cotton ribbon.  Attach a small Christmas ball or star if you like. The little trees are tips of pine and fir twigs put in burlap bags. You’ll need squares of 12 x 12cm for them. Fold them in half twice and cut a quadrant then. Open the burlap and put some pebbles or decoration rock stones in the middle for a better stand. Close it to a bag and fix with a ribbon. Before fastening the knot put your little twigs inside.

Weihnachtstisch8

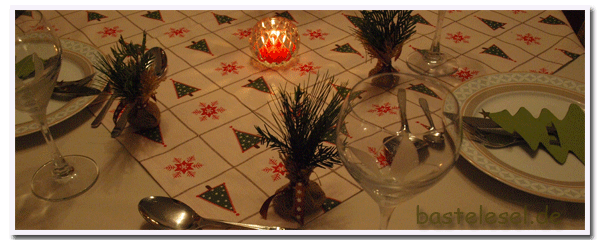
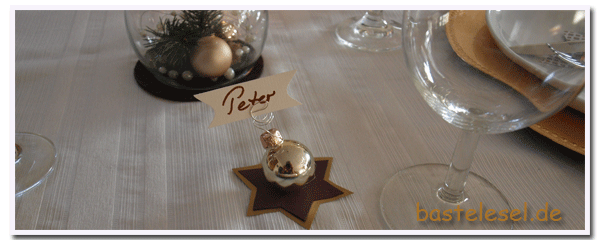
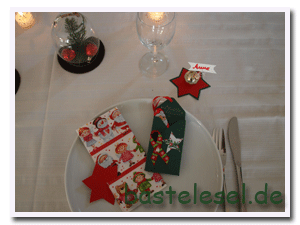
Put your little trees in the middle of your table (see foto at the top) or use them as place holder and put them beside each plate. Then you should attach a little paper star as a name tag.


Knobby trees

Weihnachtsbaum1

These lovely edible Christmas trees will be the hit of your Christmas tea time table. If you have time enough you can even cook them just on Christmas Eve together with your kids to sweeten time of waiting for Santa to come. You may take any recipe for cookies that usually are rolled. I took the following ingredients:

250g wheat flour, 1 tsp of baking powder, 100g caster sugar, 1 dash of salt, 1 bag of vanilla sugar, 3 egg yolks (size M), 150g soft butter, some green food coloring, 1 tsp of baking cocoa, some powdered sugar and sugar pearls for decorating.

Give all ingredients, except food coloring, cocoa and decorating material, into a large bowl and knead with the hooks of your food processor. Then wrap dough in film and place in refridgerator for half an hour.
Now take off one quarter of your dough and knead in cocoa powder. This dough is neede to the trees’ trunks. The remaining dough will be colored green. Therefor give food coloring to the dough and knead between two layers of wrapping film until completely colored.

Weihnachtsbaum2

Now form 10 little balls having a diameter of 1cm for every Christmas tree and assemble them directly on your baking tray as on the picture above. Take some brown dough and form a ball a bit larger to make the trunk. Press it lightly at its side and put it beneath the first row of green balls.
Cook trees in your preheated oven at 175°C for about 15-20 minutes. Remove from oven and cool on baking sheet. Then put them on a cooling rack for decorating.

Weihnachtsbaum3

Mix powdered sugar with some drops of water and scatter it on your trees. Set some sugar pearls on top. Just before serving  dust the trees with some powdered sugar again. Thus it will snow at least on your tea-time table.


Christmas table

Goldweihnacht1

Only seven days left until Christmas Eve and here are the first impressions for a Christmas table setting. Some of them quite easy others will need some more skills and materials. The “napkin rings” are simple paper stars carved between two tips. Even the simple golden star looks quite special beside its napkin companions. The dark brown inner part of the second star repeats the color of the angel’s dress.

Goldweihnacht2

My placecard is also glued to a star of golden and brown paper star. Lift the Christmas ball’s little cap and take off the hook. Then twist a piece of gold or silver wire and put it round the ball’s neck. Give a little drop of glue into the cap and put it back to the neck. Then glue the ball in the middle of the paper star with some hot glue. Put a name tag between the first spiral windings.

Goldweihnacht3

This picture shows another place holder with some Christmas accessories and a wine glass decorated with angel wings. These wings are cut from translucent paper and attached to the glass stem with a very thin golden wire. The turned glass keeps some Christmas balls and an artificial fir twig. If you like splendour place an additional tea light in matching colors on top of the glass bottom.
Take any color you like for your personal decoration.

Goldweihnacht4If children are joining you the table may be dressed in colors a bit more cheerful. The funny napkin is folded and held by a simple red paper star. The same red star glued to a dark green one is the Christmas ball’s support.  Treat the ball as described for the brown star. In addition we’ve placed a turned glass once again. This one keeps red Christmas balls besides the fir twig. The chocolate Santa goodie is quite easy if you’re disposing of an envelope punchboard. If not you’ll be forced to improvise a bit. Free templates for stars and wings can be downloaded here and an instruction for the goodie bag will follow.


Sorry

Sorry

Installed wordpress 4.4 – since then things go wrong. First my translations were recorded but not published, now the gallery’s out of order. So if you’re looking for any special post you  have to take the search button because pictures don’t show post’s name and actually don’t link to the corresponding post.
I’m working on it but remember it’s Christmas time and lots of other things need to be done. I’ll do my best to get the gallery working after Christmas.
Nonetheless publication of new posts is guaranteed.


Pizza Santa hats

Santapizza1

The traditional italian pizza in a Christmas outfit – in other words in the shape of Santa’s hat. Take any covering you like as long as it is red. In our case it’s red peppers, salami and lumpy tomato sauce.

Flatten the pizza dough and roll out a rectangle that should be divided into stripes 10cm wide. Then cut these stripes into 12cm long segments and those diagonally in halves. The dough surplus when cutting the dough plate will be taken for the hat’s border and the bobble lateron. Continue decorating the dough pieces directly on a baking tray or a pizza stone because it’s diffcult to move them when decorated.


Santapizza2Santapizza3

Fold the triangle’s upper tip to the sloped side to look like a hat’s end. Then spread the pizza covering and leave a gap of 1cm at the hat’s bottom. Take some of the dough remains and form a thin roll which needs to be divided into 10cm large strips. Flatten their ends lightly.

Santapizza4Apply some whisked egg yolk to the hat’s stripe and put the dough roll on top, press it down lightly and fold its’ ends under the hat. Some further whisked egg yolk on top of the roll will keep the ground cheese, thus it looks like a fur border. Then spread some egg yolk to the tip of the hat and place the bobble. Now they’ll go into the preheated oven (200°C) for 15-20 minutes. If you’re a perfectionist apply some tomato paste mixed with the egg yolk’s remains to the hat points after you removed them from the oven. I did it with one of the hats before cooking them but the tomato paste became too hot and looked very brownish afterwards. These hats are a funny snack for a chummy meeting during Christmas season.