Strawberries at table

Erdbeeren1

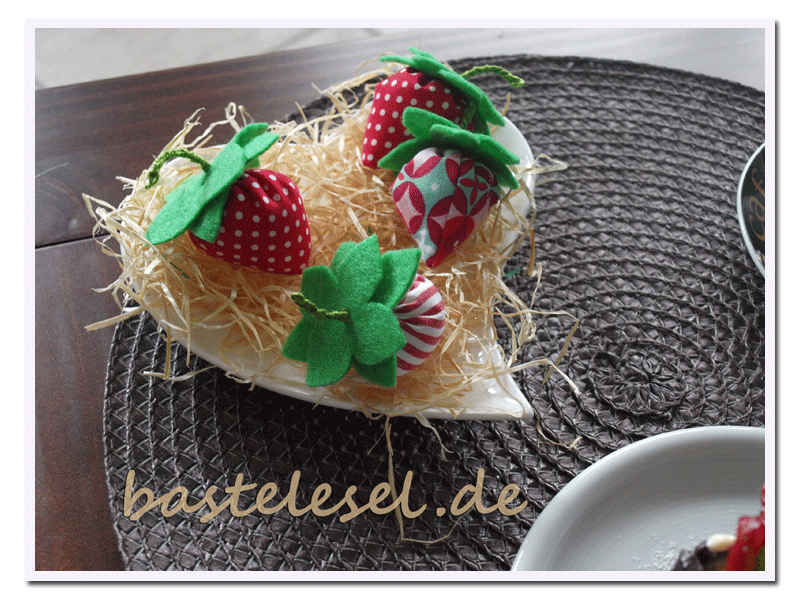
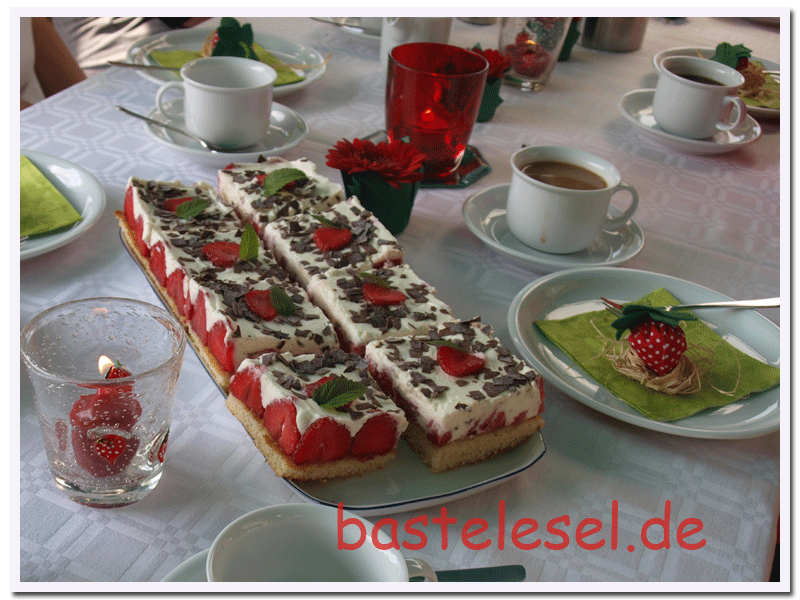
It took me some time to continue with my strawberry posts because technical problems prevented me from showing you my table decorations.
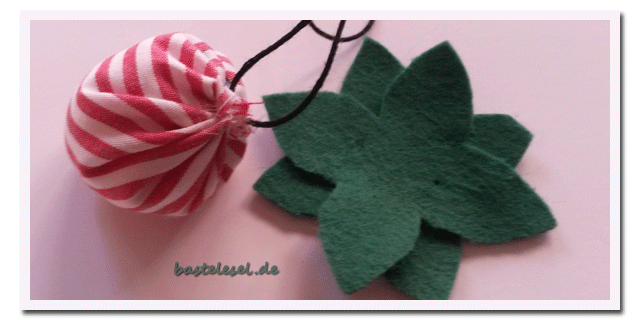
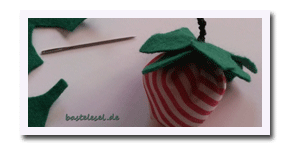
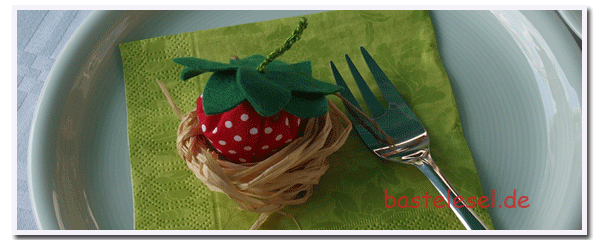
Simply take some green paper napkins as a base for those fabric strawberries. These are sitting in a small mold of bast fibers. For the mold you need 3-4 fibers of 50-70cm length. Twist them around the fingers of your hand and fix the ends by wrapping the lapped fibers before inserting them in between. Place the mold on your paper napkin and join the strawberries.

Erdbeeren2

Matching with the strawberries I chose some tea light glasses in dark red and with a strawberry print. Mine were a gift but you can easily paint some  window color strawberries on simple glasses. Red gerbera in little green paper vases will complete the decoration. I’ll post an instruction for these vases lateron. To get such a decorative border for a cake you’ll need a square cake frame. Recipe and instructions will follow too.


Strawberries

Erdbeeren

Strawberry fans will love them – these lovely fabric strawberries. These long-life berries will stay much longer than summer and they’re nice for all sorts of decorations. Whether you’ll sew them by machine or by hand, they’re done in a few minutes. Here’s a free download pattern for leaf and fruit. Take one or two leaves for each strawberry. For a better presentation I sewed one strawberry with an extra strong thread.

Erdbeeren1a

Sew long thread along round edge with baste stitch. Lateron the strawberry will be closed with it.

Erdbeeren2

Fold strawberry in half, left side out and sew side and top of the fruit with a back stitch – see blue thread. Turn strawberry inside out and pull black thread a bit tighter.

Erdbeeren3

Fill strawberry with some wadding and pull tight black thread and make a strong knot. The fruit’s now closed and the felt leaves can be fixed.

Erdbeeren4

Stagger both leaves and sew them with some bead yarn. (for my decoration strawberries I took a green thread of course)

Erdbeeren5aErdbeeren6a

After fixing the leaves with two stitches leave a loop for the peduncle, twist the thread around and fasten it by going through the peduncle once or twice.
They’re unfit for consumption but a fantastic ornament for various decorations. Further suggestions will follow.

Dessert with ice cream

Icecream

A perfect combination for the tinkering donkey – vanilla ice cream with strawberries and some delicious mint chocolate thins. An eye candy among desserts. I saw it on theeverybesttop10.com and tried it immediately.
For a large group of guests the “ice boxes” should be prepared the previous day. Thus the melted chocolate spread on the mint thins edges will have enough time for hardening. The strawberries are to be sliced. (I used an egg slicer to get really thin slices) Give an icecream scoop into each mint box, place two strawberry slices on top and add a leaf of bee balm. Topt it with some powdered sugar and serve immediately. A dessert to melt away!

A new old shirt

Shirtupgrade1

Oops, accidents happen. In spite of my great care I got a large spot of window color in the front of my t-shirt. Neither stain remover nor several washes could help. Fortunately the tinkering donkey loves the marine style for summer clothes and there was a peace of white dotted red fabric left over from last year. A small part made a breast pocket sewn directly on top of the unwanted stain. The pocket is to be cut out twice and sewn right-sides-in leaving a small opening for turning it inside out afterwards. Iron your pocket and then attach it to the t-shirt with a straight stitch.

Shirtupgrade2

To enhance the marine style I added a small piping to the neckline and prolongated the hem. In both cases I cut a matching strip of fabric, folded it in half lengthwise and sew the open sides together with a zigzag stitch. Then the strips are fixed to the left side of neckline and hem with pins. I sew them with a red thread from the right side just beside the original blue seam.

Shirtupgrade3Shirtupgrade4

For the neckline I took a twin needle to keep it still elastic. The hem is fixed with a 4mm straight stitch.
Now my shirt looks like a new one and it still matches with the other marine style clothes.


Cheese muffins

Cheesemuffins1

Days are still becoming longer and every now and then there’s the chance to stay outside for a light dinner. You will surely enjoy the lovely cheese muffins seen on lecker.de. Serve them with a fresh beer or white wine and you’ll have a wonderful snack.

For 12 normal sized muffins or 24 mini-muffins you’ll need:

75 g red pepper
50 g spring onions
75 g Gouda middle-aged (Emmentaler will do it too)
100 g butter
1 tsp salt
1 tsp sugar
2 eggs size M
250 g Crème fraîche
175 g wheat flour
1 1/2 tsp baking powder
24 small or 12 normal sized muffin cups

Preheat oven at 180°C, grease muffin mold/silicone cups or place paper cups on a baking tray.

Clean pepper and spring onions and cut into chunks resp. rings. Finely grate cheese. Blend butter, salt and sugar until creamy, add eggs successively and stir well. Add 100g crème fraîche and the mixture of flour and baking powder. Fold in grated cheese and pepper and spring onions except 1-2 teaspoons to be left for decoration. Divide the mix between the muffin cups and bake in the oven for about 20 minutes.
Remove them from the oven and leave them on a rack for cooling. Just before serving them stir the remaining 150g of crème fraîche, season with some paprika and give a dollop on top of every muffin. Decorate with left over pepper and spring onion rings. Place the muffins on a plate or a cake stand either warm or colde. They’re delicious in any case.

Cheesemuffins2Cheesemuffins3