Napkin Wings

Serviettenfluegel11

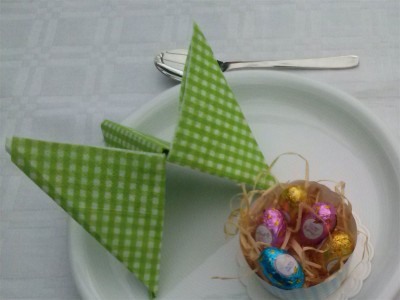
Today I’ll show how to fold the napkin wings. Being rather firm the napkin will stay in position very well but still looks light and breezy. It’s best to take napkins patterns without top and bottom print. All steps are explained beneath the pictures at the end of the post.
For a further decoration the wings simply have to be turned upside down and you will get a trident.

  • Show All
  • Serviettenflügel/Napkin Wings/Serviette en papier – Ailes

Easter Nests

Nest6

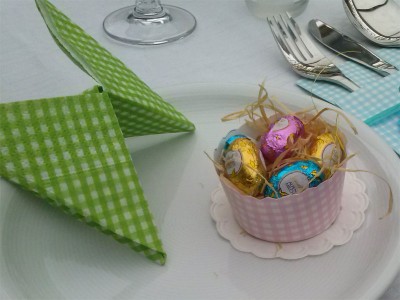
The Easter Table without eggs – impossible! For my chocolate eggs I cared for the color matching with the other decoration parts and only found small eggs. That’s why I made my nests with the small pattern enabling me in addition to use my gift wrapping paper. If you prefer making the nests a bit bigger you should take the second pattern and probably use cardstock paper. Otherwise you should also take small eggs for the wrapping paper which is not that stable.
Transfer chosen pattern to the backside of your paper, cut it out and make further cuts into both ends like shown on pattern. Then put both cuts into each other so that the end flaps are inside of the nest. For keeping it stable fix the flaps with some glue. Fill them with Easter grass for decoration and put in the Easter eggs. If you don’t like placing the nests directly onto your plates you may put some paper coasters beneath.
The bigger nests can be placed in the center of the table with some Easter bunnies at their side.

  • Show All
  • Osternest/Easter Nest/Nid de Pâques

Cutlery Pouch

Bestecktasche6

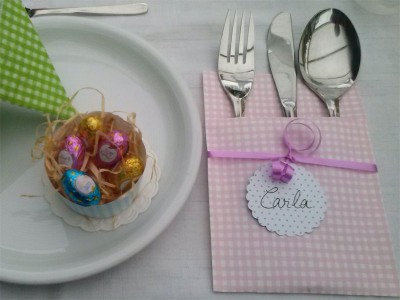
It started with the cutlery pouch and went on with nest, butterflies and paper napkins. For one pouch collecting fork, knife and tablespoon you’ll need a stripe of paper mesuring 4×14 inches. Having the left side of your paper facing to you the upper short side will be folded down 2 inches and other side 1 inch up and both ends fixed with glue. Now take the lower half and fold it up leaving 4.5 inches free on top. Open the fold again and apply glue or double sided adhesive tape. Then fold it up again and fix it. I made the name tag with the help of a punch but if you don’t have any you’ll find a sample here. I fastened it with a gift wrapping ribbon and for Easter I’ll place some daisies behind it.
If there are some pouches left after celebrating you may use them as a little gift wrapping. Simply place a voucher, a bank note, or another thin gift inside, fold down the upper edge and push it beneath the ribbon. If necessary change the name tag and make a new one.

  • Show All
  • Bestecktasche/Cutlery Pouch/Porte-Couvert

Easter Table Setting

Ostertisch1

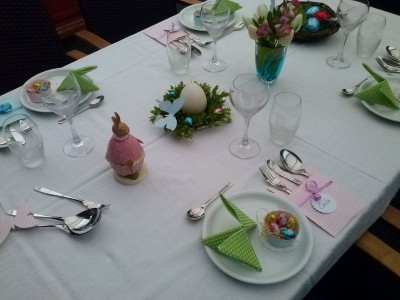
In my wardrobe you’ll scarcely find pastel shades. That’s probably why I like using them for my table settings. In our craft supply store I found two lovely giftwrapping papers in light blue and pink. I will take them for my Easter table setting. I made cutlery pouches, little nests and light butterflies with them. Matching with their color I bought some pink and blue chocolate Easter eggs. The checkered paper napkins in green and white are folded like wings in accordance with the butterflies and the light green repeats the fresh color of the young box tree twigs surrounding the candle. The Easter eggs are wrapped in colored foil I found besides all the other colors for Easter. If you prepare the table setting for a breakfast the eggs will even keep warm in this isolating foil.
Within the next days I’ll explain every single detail of the table setting and post all necessary patterns in a PDF-file. Today’ll do the description of the flowers. I chose white tulips with a pink flower in their middle. (forgot its name) Unfortunately I didn’t have a light blue vase. So I took a simple jar and colored the water with some drops of blue food color matching with the other parts of the setting. Those colors, I always store them in my kitchen and I think that what we’re allowed to eat can’t be unsound for flowers.

  • Show All
  • Ostertisch/Easter Table Setting/Décaration de Table-Pâques

Little Easter Chicks

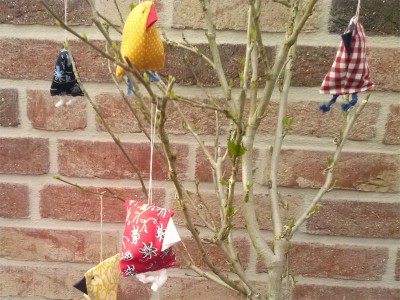
Kueken1Nearly half of the fasting weeks have gone and it’s time to think about Easter decoration now. Besides the traditional Easter eggs I like to decorate some branches with these little chicks. I’m using different remainders of cotton cloth. If you don’t have any at home you can buy some quilting or patchwork cloth. It’s offered in packages of colors and patterns matching with each other. You can sew them with a sewing machine or by hand. Therefore these chicks can also be made by children.
The chick’s body is made of an 8×4 inches rectangle. The beak is a square of 1.5×1.5 inches. Fold the square diagonally and then the new triangle from left to right side so that the tips of the bottom will touch. Turn the new triangle and place it on the right side of the body’s cloth just beneath the middle fold. The tip of the beak is showing to the middle of the body. Now fold down the upper part of the body. Now sew both sides of the body, turn it and fill it with wadding.
For the legs simply twist some cotton yarn. It’s economical to twist a cord of several inches, divide it with knots and cut it into 1.5-2 inches long parts – the chick’s legs.
To close the body just turn the lower border inside for about 0.5 inches and press them together with the side seams touching in the middle. Place the legs in between and sew them together with the bottom. If you want you may sew little eyes with a cotton thread and also fix a thin thread at the top of the chick to hang it up. According to the choice of cloth you’ll get a motley or color matching decoration.

  • Show All
  • Küken für den Osterstrauch/Little Easter Chicks/Petits Poussins de Pâques