Christmas Tree Napkin

Weihnachtenbraun4

Folding napkins is not always that easy but if the instructions are accompanied by detailed pictures I manage to fold most of them. That’s why my post today will be rather short and folding my Christmas Tree simply means to open the gallery and follow the steps of each picture.
For my instructions I chose a patterned napkin making it easier to see every step.
Now go in and start to fold.

  • Show All
  • Weihnachtsbaumserviette – Christmas Tree Napkin

Holiday Table Ideas III

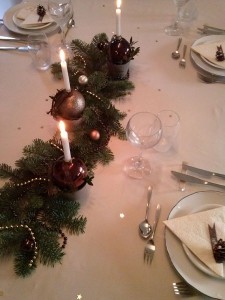
Weihnachtenbraun9In my December 12th post I told you that the Christmas ball candleholder would embellish my table for Christmas Eve. Together with two further specimen in lightly different shades it’s standing between fir twigs I placed in a line in the center of our table. The checkered ribbon has been replaced by a satin/organza ribbon in dark brown. A golden and a dark brown bead chain are loosely twisted around the twigs and some small Christmas balls placed in between. In addition I scattered some little golden stars on my white coffee colored table cloth. This is all because there’s some space needed for bowls and further dishes and I hate to remove decoration before placing them. I chose a plain colored napkin with a floral embossed design folded like a Christmas Tree. I dressed it up with little cones holding a name tag. (seen on hgtv.com) The tips of the scales are to be colored in creamy white and studded with little pearls in white or silver. For the name tag cut some paper stripes of 3 x 0.5 inches and fix the cone on one end. Use a pigmented pencil if you have chosen a dark paper.
How-to instructions and detailed pictures for the napkin tree will follow tomorrow.
You may of course change the colors for this decoration. Very nice and precious are white, silver or golden Christmas Balls for the candleholders and for the bead chains. Then it’s worthwhile to take a dark green napkin repeating thus the twigs’ color.

  • Show All
  • Weihnachtliche Tischdekorationen III – Holiday Table Ideas III

Braided Star

Flechtstern15

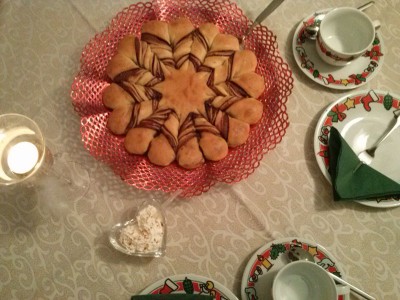
Honestly I couldn’t resist when I read the instructions for this wonderful yeast dough. I checked my supplies and was wondering whether my star would really look like the one shown at handimania.com. It did indeed and it will become my favourite Holiday cake this year. I couldn’t have given you the instructions better than the original. So simply follow the link and try that dough yourself.
Remarks:
Instead of three layers with chocolate I spread redcurrant jelly on the second layer. That makes the single pieces a bit more slippery for twisting lateron but the different colors look very nice and I had so much jelly left from another cake. I had to heat my chocolate cream in microwave because it was a bit too hard for dispersing on soft dough.

  • Show All
  • Stern für die Kaffeetafel – Braided Star

Holiday Table Ideas II

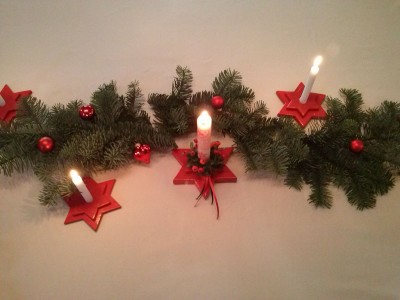
Weihnachtenrot3For all those who love the traditional combination of red and green for their holiday table. Several balsa wood stars create a nice atmosphere when placed beside some fir twigs in the middle of your table. We sawed stars of two different sizes and drilled a hole having the same diameter as the Christmas Tree candles into the smaller stars. You may use the template of my earlier post for sewn stars. All edges should be rounded with sand paper and the small stars be glued to the bigger ones. This goes best with wood glue. If you don’t have bar clamps take some heavy books to lay on your stars until glue has come firm. Then all stars are painted with red varnish. This has to be dried at least half a day. You may as well buy ready stars, make the holes and glue them together. To fix the Christmas Tree candles heat them lightly at their bottom before placing them in a hole. For the center of our fir garland we made a bigger star for a large candle which we decorated with a little wreath. Some small Christmas balls’re completing the table decoration.
I didn’t have enough time to lay the entire table but best would be a white table cloth and for the napkins we chose a nordic pattern that fits well with the one of our big candle. We folded it like an icicle and twisted a little heart around. If you want you can even use the hearts as place settings if you write down the name of your guests on that little heart. Alternatively you can take a red Christmas Ball with the guest’s name and fix it round your napkins with a nice ribbon.

  • Show All
  • Weihnachtliche Dekorationen II – Holiday Table Ideas II

Christmas Tree

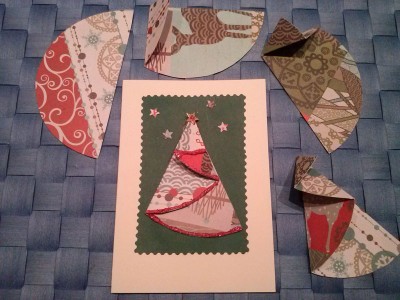
Tannenbaum5A very special Christmas Tree. You can use it for your holiday cards, as a place setting or as a pendant for your gifts. I found the how to-instructions on splitcoaststampers.com and immediately made some myself. The size of your circle determins the size of your tree. My sample was a standard music CD with the diameter of 4.7 inches. You can fold two trees of each circle and the will have a height of about 3.5 inches. Besides patterned cardstock you need some glue, glittering powder or quite thin ribbons.
Draw circle, cut in halfes and mark the center point of each straight line. Now take on corner of the half and fold it to the marked center point. Press down first fold line and return corner to just this fold line. Now flip your tree so that the folded parts are underside. Turn the short edge and fold it along straight line of the half. Press down carefully and fix the bows with a drop of glue.
If you like you may decorate your Christmas tree. Place a thin line of glue along the bows of the tree and spread some glittering powder on top. Instead of the powder you can also fix a thin golden ribbon along the bows. You can place it on a card or if you stamp a little hole in its top use it as a pendant for your gifts. If you want to use it as a place setting you should place the name of your guests along the lowest bow.

  • Show All
  • Weihnachtsbaum – Christmas Tree